Friday, September 23, 2016

Roofing

With the weather starting to turn more northwest than usual I was highly motivated to get the roof finished up.  I decided to go with Ondura corrugated roofing for a number of reasons.  I liked that it was light weight, being made of recycled paper product with asphalt.  Also I liked that cutting it seemed like an easier endeavor, no tin snips or crazy sharp finger severing edges.  I also thought maybe the metal might be louder during rain storms.  I also read the metal corrugated can rust when scratched.  I don't know how long my paper roof will last but its paintable to hopefully extend its protective life.  The clincher was seeing how great the roof over at Tiny House Giant Journey looks.  Mine didn't go on quite as nicely but I'm ok with it.  I was so eager to get the roofage started I dragged a rather heavy roll of tar paper up onto my reasonably steep roof to get started.  Some of you may already see the stupidity of what I just said.  "Why drag the entire roll up on to a pitched roof?  What exactly were you thinking was going to happen when you got to the top of the ladder?"  Well shut up.  I figured it out eventually.  After cutting a length of workable length of paper I went to work stapling down the sheets.

Shortly before my fall
I would have thought that with a name like tar paper there would have been a level of tack.  My advice for the day is don't try and roof by yourself, but also don't assume stapled tar paper is a sturdy surface for standing on.  I now know how much a leg brace costs.  I got lucky with only a small fracture and a few sprains of the ACL and LCL when I fell in a very undignified heap after my tar paper slipped out from under me.

Technically after my fall.  To add more stupidity I worked the rest of the day on my injury.

Progress has been somewhat limited since then but due to a remarkably touching outpouring of support from my friends the roof was completed and we are on our way to getting the siding started before the weather gets even worse.  Thank you to all those who are making progress possible.


windows

I've been looking forward to installing my windows for a while.  I have had them since before I even had walls.  I went with the idea that it would be easier to frame around existing windows instead of the other way around.  After watching lots of install videos and consulting a number of my regular tiny house blogs I felt ready to give it a go.  I'm always a bit trepidation with any project which involves the potential of water leakage and obviously the windows was a big possibility for disaster.  I'm not going to explain the process because its already been done so much better than I can.  After the first window I thought the process was going to be a breeze, a little messy with the caulking, but easier than I thought.  Then I went inside to test the window operation and realized I forgot to center the window and ended up with uneven gags to either side.  I filled in the gaps with expanding window sealant foam.  I don't know if that's what you are suppose to do but I did it anyway.  The next window I layed down the flashing, put the bead of caulking and hoisted the window into place only to discover it wouldn't fit.   I had forgotten to dry fit the window, well I guess before that I forgot to double check my framing.  I had to tear out the flashing and some of the housewrap with it, then I used a sander and reciprocating saw to carve out a slightly bigger opening until the window fit.  This was definitely not an elegant operation and the window fits so snugly now that I'm worried that during road travel or swelling the window might crack.  Time will tell.  The rest of the windows were some combination of complication with none of them being perfect but they look windowy so I'm calling it good.  The rain since install hasn't shown any leaks.

roof sheathing

This is where things started to definitely get sketchy in the safety department.  I don't have a great track record for doing the smart or safe thing when it comes to working solo and this was no exception.  Those pieces of plywood are large and heavy.  I used half inch plywood in 4x8 foot sections.   Because the house is 16 feet long and I allowed a bit of an overhang at the front and back of the house two pieces of plywood was insufficient so I staggered as best I could trying to remember this time to let the seams fall on the rafter studs.  I was a tiny bit unclear on what to do with the ridgeline.  Should the plywood touch at the crown or not?  I went with not quite touching.  Gluing the sheets into place was exciting.  I knew if i tried to glue all the rafters and drop the plywood onto it I would be faced with trying to muscle the 4x8 foot section up the ladder and hope it fell where I wanted it to go.  Instead I slowly dragged it up the ladder, pushed it into place, screwed in a couple of brace boards so it wouldn't slide off the roof, then propped up the high end so I could squeeze the glue between the rafter and the plywood and then removed the brace so it fell less of a distance and I had more control.  I don't know if this was easier or not but it seemed to work ok.  For the smaller pieces I balanced myself on the already glued and screwed plywood and trusted to the worn out tread on my hiking boots to keep me in place while I placed the plywood.  Then I caulked the hell out of the seams.  I got a bit of rain shortly after and it did leak a bit but I just added a bunch more caulk.  My advice of the day is to buy liquid nails and caulk in bulk as you will use all of it and then some.  

tyvek


For some reason I opted for the 9 foot tall roll of Tyvek Housewrap.  I think it comes in shorter rolls but since I normally work alone the 9 foot roll seemed the most difficult to work with solo and since I don't seem to do anything the easy way it was a no brainer to get the monster roll.  Fortunately for me I had help, Thanks Duc!, and although awkward we got the whole house wrapped in an afternoon.  We had one person hold the roll at the bottom of the trailer/plywood edge with me up on the ladder guiding the unrolling and stapling as we go.  I guess we could have stapled on end, unrolled to the other end of the wall, straightened it and then stapled but we didn't so deal with it.  I used staples instead of the nails with the plastic washer heads because I had staples on hand.  Then I taped all the seams with the Tyvek tape to seal out moisture.  The whole process was a tiny bit easier than most of my building endeavors although I still wasn't able to avoid all the wrinkles.

Friday, July 15, 2016

sheathing, rafter ties, and rafter install


I finished up the rest of the sheathing.  I did the whole project in screws and glue.  I can see the benefit of applying the sheathing horizontally instead of vertically for no other reason than it's easier to mark where the studs are.  My research didn't come down on any clear preference.  People have done it both ways and both seem to be ok.  

Then I cut out the windows and door.  

Then I got started on the rafters by installing this super expensive rafter holder things.


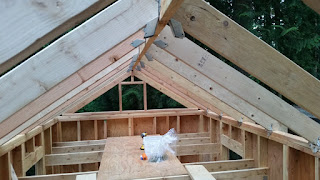
Then the rafters went up.  There was a significant amount or experimenting and recreating rafters until I got enough that fit to get the job done.  I now have lots of scrap 2x6s.


I'm going to put some blocking between the rafters for a reason I don't quite understand yet.  I also need to put in some patches where the plywood didn't quite square up.  Then I think I can put the house wrap up and get started on window/door install.  I might plywood the roof after the house wrap and before the windows just so I can take off the tarp.  I'm learning to adapt my timeline of operations to fit my materials on hand and access to help.

Sheathing

I got some good progress accomplished this weekend.  Sheathing was challenging for me in multiple ways.  First is that four foot by eight foot half inch plywood is not particularly heavy but pretty unwieldy to try and hoist into place and clamp.  I've always had a difficult time asking for help but after several painful and frustrating attempts it was clear this wasn't a solo project.  My building host family is great.  They are always willing and able to help with advice, heavy lifting, supplies transport and really great cooking.  Thanks Severign and Scott!

That pesky arc around the wheel well of the trailer had me head scratching for an embarrassingly long time.  There might have been an easier way but I ended up using a sturdy yard waste paper bag to trace out the outline of the wheel well and transfer it onto the plywood sheathing.  With a little experimenting and some help I got the arc pretty close and after we cut out the first one we had the left over plywood to use as a more study template.  Things become much easier after that.  Put plywood in place, clamp, trace out wheel well with template, take plywood down, cut out wheel well arch, apply glue to studs, place plywood back in place, clamp it down again, screw it down with a ton of screws, rinse and repeat.
The template that made it all possible.


half way sheathed (my new band name?)

It really felt fantastic to get four of the panels up and see a good half of the house closed in.  I'm thinking about stringing up my hammock on of these summer nights and spending my first night in the house that a misanthrope built.

Tuesday, June 14, 2016

re-Building, re-Squaring, Rain, and Sheathing

The lack of entries doesn't mean a lack of activity, just a lack of interesting stories.  I've been dragging help wherever I can find it to the job site to help so I've been mostly fixing the things I did incorrectly.  Those eighths of inches add up.  My manor is now a safer place to live as the walls are more or less plumb and square with additional studs supporting weak spots and in correct places to accept the plywood sheathing.

The rain came back with a vengeance so the circus tent tarp went back up, however since we folded it when we put it away last time it went up much easier and we left it doubled up so I didn't have to fight with the extra puddled on the ground.  This also had the added benefit of blocking some of the holes I poked in the tarp last time I was trying to alleviate the lake-effect I created by incorrectly distributing the tarp overhead (I wish I had taken a picture of that).

No pictures this post as the house looks pretty much the same.  Sheathing is still next on the agenda.  I'm starting to feel the pressure to make some utility choices.  Propane?  Electric?  Solar?  How much, if any plumbing?

Tuesday, May 24, 2016

Ridge Beam, Trusses, Loft Beams, Top Sil, Squaring

I love the rain.  It keeps everything cool and green just the way I like it and we get an abundance here.  I wasn't so thankful this weekend.  I'm trying to learn from my near death fall from last weekend to not work in the rain tired and alone.  That made getting much done a little tricky as the rain kept starting and stopping.  I would uncover the saw, climb the ladder, put in a screw and it would start raining.  Then climb off the ladder, cover everything up and wait.  Repeat.

My big goal was the get the walls square so further work could depend on that accuracy.  Everything I've read says if you don't start square that error compounds as you go.  The walls started out a half inch off from each other, better than I expected but still something I wanted to correct.  I used braces to push the walls.  I tried using ratchet straps.  I tried shimming.  I even tried looking at it sternly.  I wasn't really getting any closer to an equal measurement.  I did however get a nice step aerobic going on as I went up and down the ladder.  I also swore quite a little bit at my tape measure.  It's not easy to measure by yourself.  I ended up nailing the bugger to the top sil.  There was probably an easier way.  Then when help arrived we decided to undo the carriage bolts and whack the walls.  That fixed some related problems but didn't actually fix the half inch problem.  In the end I decided that putting up the second top sil plate, loft beams, and eventually rafters would magically push it into the zone of correct.  Plus extreme amateur me built this house and a half inch is probably the smallest mistake I'll make.  Close enough.

We also picked up the 18' ridge beam and house wrap while I had access to a truck.  In between the rain I put the completed trusses into place.  They look good up there but I'm still a little unclear how the rafters will rest flush on top of the trusses.  Maybe when I get the ridge beam up there and cut the birdsmouth cut (extra points for lingo?) in the rafters it will sit right.

Double Top Sil Plate
birdsmouth
Trusses installed and temporary loft beams in place

Wednesday, May 18, 2016

Roof Trusses

It was an interesting week for building.  The plan was to get the rafters and ridge beam up but advisement from sharper minds convinced me to construct the roof trusses first thus giving the ridge beam somewhere to live first was the better plan.  That's where the math comes in.  This English major isn't great with math.  I'm not even competent with math, not even simple math.  Luckily I had help this weekend.  Mostly I just assisted but I'm perfectly ok relinquishing control if it means getting a finished product that is done correctly.

I got my first taste of working in bad weather this weekend as well.  I had taken down the circus tent tarp earlier in the weekend to remove the damaged experimental ridge beam supports that broke under the weight of the tarp.  Have I mentioned how heavy and unwieldy this damn tarp is?  When the rain started getting worse I decided to put it back in place.  Math isn't the only thing I'm stupid about.  I climbed up on the top of my loosely secured ten foot above the ground walls and proceeded to solo pull the heavy tarp up.  Heights, wet wood, and stupidity don't really go well together.  I fell off the wall.  Super luckily the tarp I had been pulling up and throwing over my head had been pooling behind me and I fell into an improvised airplane evacuation slide ending up in a soggy undignified heap but unhurt.  I'm hoping I learned a lesson about working alone in unsafe conditions.  I counted my blessings and carefully dragged the tarp into place.  Then my help arrived and we built our trusses which was the only thing that went off without a hitch.

The next day I discovered another stupid thing I did.  Apparently water is subject to gravity.  Since I had removed my high point ridge beam braces my roofline was now flat.  During periods of continuous rainfall a flat tarp will collect said rainfall and under the forces of gravity will turn into a rather impressive water balloon.  But wait there's more.  In an attempt to drain my roof lake I pushed up in an attempt to coax the water over the wall and relieve itself harmlessly on the gravel below.  That tarp is heavy but when it has several inches of rain on top of it the weight is unmanageable.  That didn't stop me from poking at it with a spare 2x4 and poking a good size hole thus transforming my carefully protected dry insides into my first example of indoor plumbing.  With more help I was able to prevent some of the deluge but the damage was done.  I spent most of the rest of that build day trying to dry out my OSB floor.  I also shored up some studs that needed more support, finished a few small projects and installed some jack studs to support the loft.
Notice the trusses and plastic wrap I stapled to the floor.


My next debate is the ridge beam itself.  Originally I bought two ten foot 2x8s that I planned on joining together to act as my ridge beam.  I knew that a single piece of wood would be stronger but I couldn't figure out how to get an eighteen foot long board from point A to point B.  Delivery ended up being twice as much as the board.  I think I've decided the inconvenience of begging for access to a truck is worth it to make sure the spine of my manor is strong.  If I can get the beam to the work site I think installing the trusses and ridge beam is next on the list.  If I'm lucky I might even get a start on the rafters.

Truss temporarily put in place and loft studs

Tuesday, May 10, 2016

Wall Raising and Ridgebeam

This was a good week for visual progress.  I got some help and raised up the walls onto the trailer, drilled the holes for the carriage bolts and hand tightened them to the trailer.  The walls aren't exactly square yet but closer than I thought they would be.  Discussions led me to decide against sheathing the walls while on ground.  The weight issue was not the deciding factor this time but the fact that sheathed walls are harder to square and I didn't have enough confidence that they were ready.  I'm glad I didn't.


Once all for walls were up I could get a better sense of dimension and visualize where everything would go.  Next I tackled the roof framing.  Tackle is the most appropriate description as there was no elegance to the way I approached this process.  My first problem was probably attempting math.  I knew the total legal limit the house was allowed to be: 13feet 6inches.  So I measured from the ground to the top of the walls and subtracted for the additional height the loft/roof would be.  Makes sense right?  Then knowing my ridgebeam was a 2x8 I subtracted 8 inches from the extension height so I knew how high to build the guide the ridgebeam would rest on.  Still felt like I was on the right track.  I built my tuning fork shaped brace on each of the short walls and one propped up on a crossbeam in the middle, slid the 10 foot 2x8 beams into place and thought "done".  Then to be sure I measured the total height again.  Not...Even...Close.  I wasn't really all that surprised but how could I be more than a foot off.  This house is definitely going to fall down and kill me.  I climbed back up and put two 2x6 scraps in the brace under the ridgebeam and measured again.  Close enough.


Next weekend with more help I'm hoping to get a start on the rafters.  Also here is a picture of the big ass circus tent tarp I got.  It is a handful to work with but I'm hoping will work better than several smaller tarps that might leak.


Tuesday, May 3, 2016

Additional framing and fixing old framing

This weekend was the first day of build at the new site and the weather cooperated nicely, if a little too warm for my taste and way too warm for May.  Leveling the trailer ended up being easier than I was expecting which has me worried that I did something wrong.  The loose gravel hasn't effected the leveling quite as much yet but I'll keep checking as the site settles.  I've got two scissor jacks and the trailer jack holding it slightly off the wheel with cinder blocks ready to stabilize it.  Next I unboxed all the framing that I'd done so far.


Then I continued to frame around the windows and doors.


Then while trying to drag the long walls off the trailer and set them up by myself I damaged some of the joints and probably my back.  I took the long walls apart at the seam that I damaged which had the added benefit of making it easier to move and gave me the opportunity to replace some of the wall studs that got the early "close enough" measurement.


I got some help from my site hosts which made all the difference.  I even took some time to practice laying the plywood sheathing down on the finished short wall just so I could see what that will be like.  As the weekend went on and the heat kept getting higher the mistakes started become more frequent so when I framed my last window upside down I decided I was done for the day.  Hopefully I'll get to start on the sheathing next weekend.

Tuesday, April 26, 2016

New Site

It's been a painful month of no building progress.  I reached the limit for progress at the original covered site (if I built more it wouldn't fit out of the garage).  I found a great new site closer to home and have spent the last month prepping the new site with fresh new gravel thanks to my new fantastic hosts.


 Last weekend I moved the Manor closer to home and under the open sky where it promptly got wet.  Now it's under tarps and waiting for a rain free day to dry out, then the fun begins.  Next step is to frame around the new windows and door.


Then I have a decision to make: sheath the walls with plywood while they are still on the ground and easier to work with which unfortunately will make them heavy as hell and I'll need lots of help to raise them, or raise the walls and try to muscle the plywood sheathing into place by myself.  I'm concerned that after I lay the glue I won't have time to screw the plywood down before the glue sets.  Wall raising party?

Tuesday, March 29, 2016

Windows and a Door

I went window and door shopping this weekend at Millwork Outlet in North Bend, http://www.millworkoutlet.com/.  I was pretty impressed.  They were very patient with my ignorance.  I went in with only a rough idea of the opening the windows needed to fit into and they walked me through the whole process.  Thanks guys.  I got three normal sized single hung windows (the open up and down type), one larger single hung window for the trailer hitch end wall, and two of the smallest windows I could find that open for each of the upper lofts (I've already forgotten how they open, casement maybe).  The door also has a window in it.  That means lots of light but also potential heating/cooling problems.  That was the highlight.  Then I took some of the windows to the build site to introduce them to their new home.  They were not impressed.

It took me most of my half build Monday experimenting with placement, measuring studs, jack studs, sil plates, and headers (getting good with my lingo) to mock up what I think will work.  Improvising off my plans has been frustrating for me and only by laying things out can I visualize the problem and look for solutions  My door ended up being taller than I had planned on.  The standard door is 6'8'', the plans call for 6', and any modification on that complicated things beyond what I was willing to deal with so I went with big door option.  The question came when examining how the new door height would effect my window placement.  Should the top of the door be level with the top of the windows?  If so they would start to interfere with my loft placement and my hopeful idea of placing shelves above my windows.  I decided to lower the windows, keep my shelves, and plan biting comments for those aesthetically minded folks who think I messed up my viewing lines or some such.  The plans call for the windows to be three feet off the floor, which sounds like it would be fine for the living room and bathroom but in the kitchen I wondered if the counter would be in the way so I raised them all a bit.  A bit is now one of my official measuring terms, as in 77 inches and a bit.  Do you think that will be a problem later on?

The rest of the windows and the door will arrive in a week or so and hopefully by then I will have a better plan by then.

Also I almost drove a screw through my thumb.  I offered up a blood sacrifice and smeared my viscera on the demanding wood frame.

No pictures for you this week, use your imagination.

Tuesday, March 22, 2016

Wall Framing

I've fallen a bit behind on updating here.  Wall framing is something I've been looking forward to.  It's the process that most traditionally reminds me of what building a house is.  The woodworking feels like a nice entry level experience and all the corners so far are right angles.

Over the last two weekends I learned pretty quickly that I don't really know how to read framing plans.  I also finally realized that got what I paid for with my plans.  When you only spend $99 you aren't necessarily going to get plans that walk you through each step or include everything you need.  At this point my plans have become more of a suggested guideline than anything else.  Most notably my plans don't detail how to frame around the wheel well.  I'm assuming this is because no two trailers are the same and they figure the builder can adapt.  I did, but it took a while.  The walls are only braced in place with a few screws just so I could see what I was working with, make sure everything looked roughly level and to make room to build the next section.

I added some beefer headers above my windows, which I haven't fully framed yet, to accommodate the book shelving I plan on putting above the windows.  My plans didn't have any headers whatsoever.  I'm still a little unclear if I did the wall corners properly.  My favorite lesson so far has been there may not be a properly.  House on wheels means no code compliance or inspections so as long as it doesn't fall down and kill me I'm content.  Living dangerous is something new I'm trying.

I didn't complete my window and door framing on purpose because I thought it might be easier to frame around the windows and doors that I find and might be overstocks, factory seconds, or returns, instead of framing based on my plans and then have to find something to fit the space, maybe even have it custom made.

I am glad I decided to construct my framing with screws instead of nails as it means I can take apart and adjust as needed, and it has been needed.  Next step will be prebuilding roof stuff.  Maybe the next step should be figuring out what the roof stuff is called.


Tuesday, March 8, 2016

Subfloor Plywood Installation

This weekend I tackled the plywood part of the subfloor.  The first hitch being that the hardware store didn't have any 3/4 inch tongue and groove plywood available.  I know this is always an option and one that frustrates people such as me who wants to do it now.  I ended up going with the cheaper and lesser quality OSB plywood instead.  I've heard the OSB doesn't do well when it gets wet but since I'm currently building under cover I figured I could get away with it.

Next tricky part is 4'8' pieces of wood are heavy and awkward to move.  I needed a little help moving them around but luckily Brother in Law was available and willing.  My visual sense made it challenging for me to orient the boards in such a way that I would know where to cut them.  There was a couple times I almost made the wheel well cutout on the wrong end of the board.  Luckily I didn't make any irreversible cuts.  I laid them in place staggering them so none of the seams matched up thus compromising the strength of the floor, or something, before gluing and screwing them in place just so I could be sure they would all fit proper.  There was a bit of confusion when I realized the 4'8' OSB laid side by side naturally measure 8 foot wide, however my trailer is 8'4'' wide.  I decided to shorten the first piece so that by the time I reached the other side of the trailer instead of having a tiny 4 inch strip I ended up with 10 inch strip.  Seemed like a workable compromise.  We shall see.

I bought some subfloor adhesive which is suppose to be less rigid so the floors can wiggle a bit without squeaking.  The package said I had about ten minutes of good gluing time before the substance starts to lose it's glueness.  The race was on the put up the super heavy boards, not move them too far out of place so I didn't put them back in the wrong order, glue the top of the joists, drag the heavy boards back into place without disturbing the glue, and let them fall into place and land right on the joist so as to not smear the glue.  Well that didn't work all that well but I got them where they needed to be.  Pleased with myself at finishing that step I laid down on my new floor to celebrate a job well done.  I started thinking about the next step of screwing the plywood down.  I had the screws on standby and the impact driver all charged up.  I was ready to rock and roll.  Then I realized I no longer could see the joists that I needed to screw the plywood into.  I then recalled a helpful hint I had read that said snap a chalk line after you lay each piece so you can transfer those joist lines to the top of the plywood.  Damn my over exaggerated sense of enthusiasm and lack on knowledge.  I didn't want to pull the still drying boards up for fear of losing my glue seal so I prayed that my 16 on center joists were still predictably where I needed them to be.  A little experiment allowed me to feel the difference between hitting that joist and not.  I can't say those connections are crazy solid but I'm ok with what I ended up with.

Now all screwed and glued I'm ready for the wall framing.  I even had a little bit of time to lay out a mock-up of what the first wall might look like.

Saturday, March 5, 2016

Finish subfloor framing and insulation

Last weekend I finished up the subfloor framing with another trip to the store and some creative joist hangering to avoid the carriage bolts that were in the way of my 16 OC joists.  Mostly it just means one of my joists is a bit off center.  Then I put in the Roxul Insulation.  Having it come in 16 inch wide batts made it super easy to just drop it in between the joists.  I used the bread knife cutting technique and finished the whole project in less than an hour.  Next weekend I'm hoping to finally get a hold of the T&G subfloor plywood i need to finish up the subfloor. 

Tuesday, February 23, 2016

More Subfloor framing


This weekend I cut the 2x4x8 to length for my side joists?...maybe rim joists?...the long boards along the sides of the trailer and then secured them to the trailer with these bad boys:
 they are 5 inch galvanized carriage bolts.  The end result looks like this:

Then I screwed in the Simpson Strongtie joist hangers at 16 OC, which I learned means On Center.  I did the 16 OC not because that is building code, although it might be, but because the Roxul Insulation I got comes in 16 inch wide batts and I'm lazy and didn't want to cut them.  I'm not proud to admit it took me longer than it should have to figure out how to measure from the middle of one 2x6 to the middle of the next 2x6.

I didn't get to finish the joists because I ran out of hangers but also because one of the carriage bolts is in the way.  I may have to put one of the joists slight more or less than 16 and then just try to remember the irregularity for later.


Tuesday, February 16, 2016

Build Site and Subfloor Beginning

Picked up the trailer from Iron Eagle.  Thanks Rob!  I opted for some trailer additions: 22 gauge steel floor pan and some extra fender flashing to help prevent moisture invasion.  Luckily my sister volunteered to let me start my build in her huge garage.  It rained all weekend and the covered build site is fantastic.  Here is the birthplace of Misanthrope Manor:


 then I frosted the whole thing with this stuff:

I used it to prevent thermal bridging.  The trailer is metal and cold and I didn't wan't that temperature leeching into the house.  Also I'm hoping it will be an added moisture barrier between the cold metal and warmer wood.  Here is the end result:

I also bought some 2x6s for the subfloor framing, roxul insulation, a vapor barrier, screws, extra bits, and some simpson strong ties to attach the short floor joists to the longer floor joists, maybe, I'm still working on the vocabulary.  The first small step felt huge.  Next weekend: floor framing.