Friday, July 15, 2016

sheathing, rafter ties, and rafter install


I finished up the rest of the sheathing.  I did the whole project in screws and glue.  I can see the benefit of applying the sheathing horizontally instead of vertically for no other reason than it's easier to mark where the studs are.  My research didn't come down on any clear preference.  People have done it both ways and both seem to be ok.  

Then I cut out the windows and door.  

Then I got started on the rafters by installing this super expensive rafter holder things.


Then the rafters went up.  There was a significant amount or experimenting and recreating rafters until I got enough that fit to get the job done.  I now have lots of scrap 2x6s.
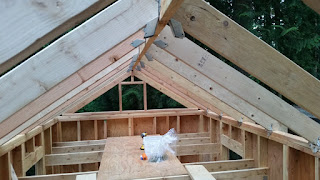


I'm going to put some blocking between the rafters for a reason I don't quite understand yet.  I also need to put in some patches where the plywood didn't quite square up.  Then I think I can put the house wrap up and get started on window/door install.  I might plywood the roof after the house wrap and before the windows just so I can take off the tarp.  I'm learning to adapt my timeline of operations to fit my materials on hand and access to help.

Sheathing

I got some good progress accomplished this weekend.  Sheathing was challenging for me in multiple ways.  First is that four foot by eight foot half inch plywood is not particularly heavy but pretty unwieldy to try and hoist into place and clamp.  I've always had a difficult time asking for help but after several painful and frustrating attempts it was clear this wasn't a solo project.  My building host family is great.  They are always willing and able to help with advice, heavy lifting, supplies transport and really great cooking.  Thanks Severign and Scott!

That pesky arc around the wheel well of the trailer had me head scratching for an embarrassingly long time.  There might have been an easier way but I ended up using a sturdy yard waste paper bag to trace out the outline of the wheel well and transfer it onto the plywood sheathing.  With a little experimenting and some help I got the arc pretty close and after we cut out the first one we had the left over plywood to use as a more study template.  Things become much easier after that.  Put plywood in place, clamp, trace out wheel well with template, take plywood down, cut out wheel well arch, apply glue to studs, place plywood back in place, clamp it down again, screw it down with a ton of screws, rinse and repeat.
The template that made it all possible.


half way sheathed (my new band name?)

It really felt fantastic to get four of the panels up and see a good half of the house closed in.  I'm thinking about stringing up my hammock on of these summer nights and spending my first night in the house that a misanthrope built.